Good morning! I’ve got some super exciting news to share today!! Lawn Fawn and Chibitronics have teamed up again to create an exclusive, limited-edition holiday kit!! The holiday kit is only available at Lawn Fawn and Chibitronics while supplies last and last time the kit sold out FAST so I would not hesitate to snag yours!!
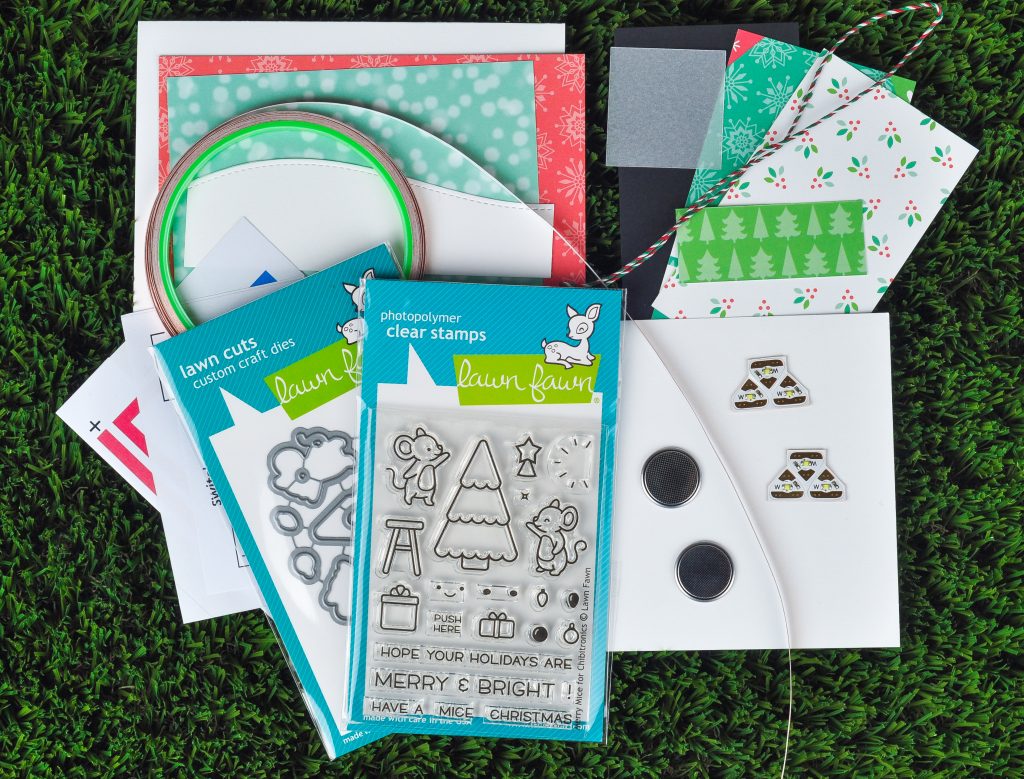
In this kit, you will find a holiday stamp set, coordinating dies, lights, patterned paper, twine, cardstock, templates, easy-to-follow instructions, and more. Create two complete projects, and learn the skills needed to create even more!
This kit contains:
- “Merry Mice” stamp set
- “Merry Mice Lawn Cuts” custom crafting dies
- Chibitronics “Merry Mice” Light Kit – 6 LED stickers, 15 feet copper tape, and 2 coin cell batteries
- Instructions, templates, and supplies to create two complete projects
- Access to inspirational videos, printable instructions, and printable templates to create even more cards
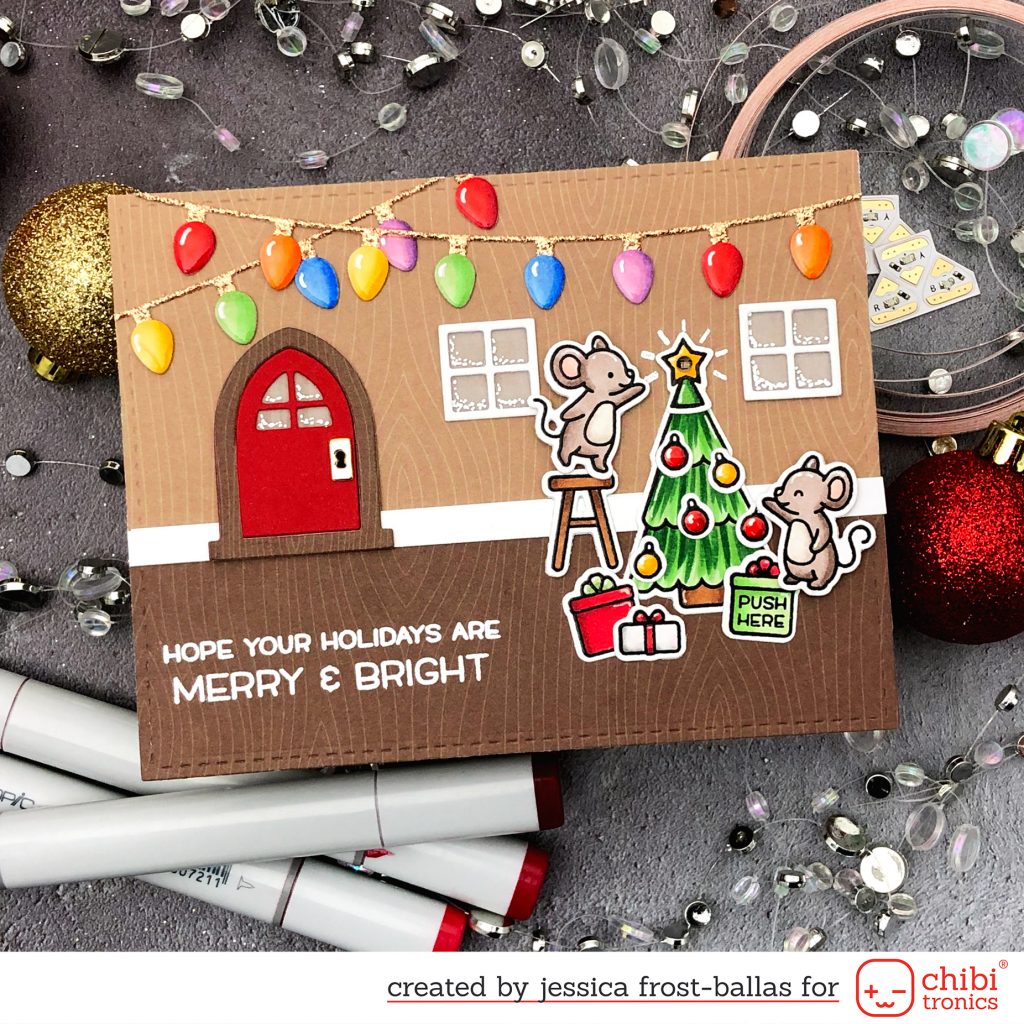
Here’s what I created using products from the kit as well as my personal Lawn Fawn stash! 😉
To start I stamped the images from Merry Mice with versafine, heat-embossed them with clear embossing powder, and colored them with copic markers before die-cutting them with the coordinating dies. I also die-cut the Mini String of Lights bulbs with white cardstock and colored them with copics. I adhered them to the strings die-cut from gold glitter cardstock. I also created elements of their home using the Mushroom House and Build a House die sets. I used my stash of Knock on Wood paper to create the walls and floors of their home. I envisioned the mice living inside a tree! 😉
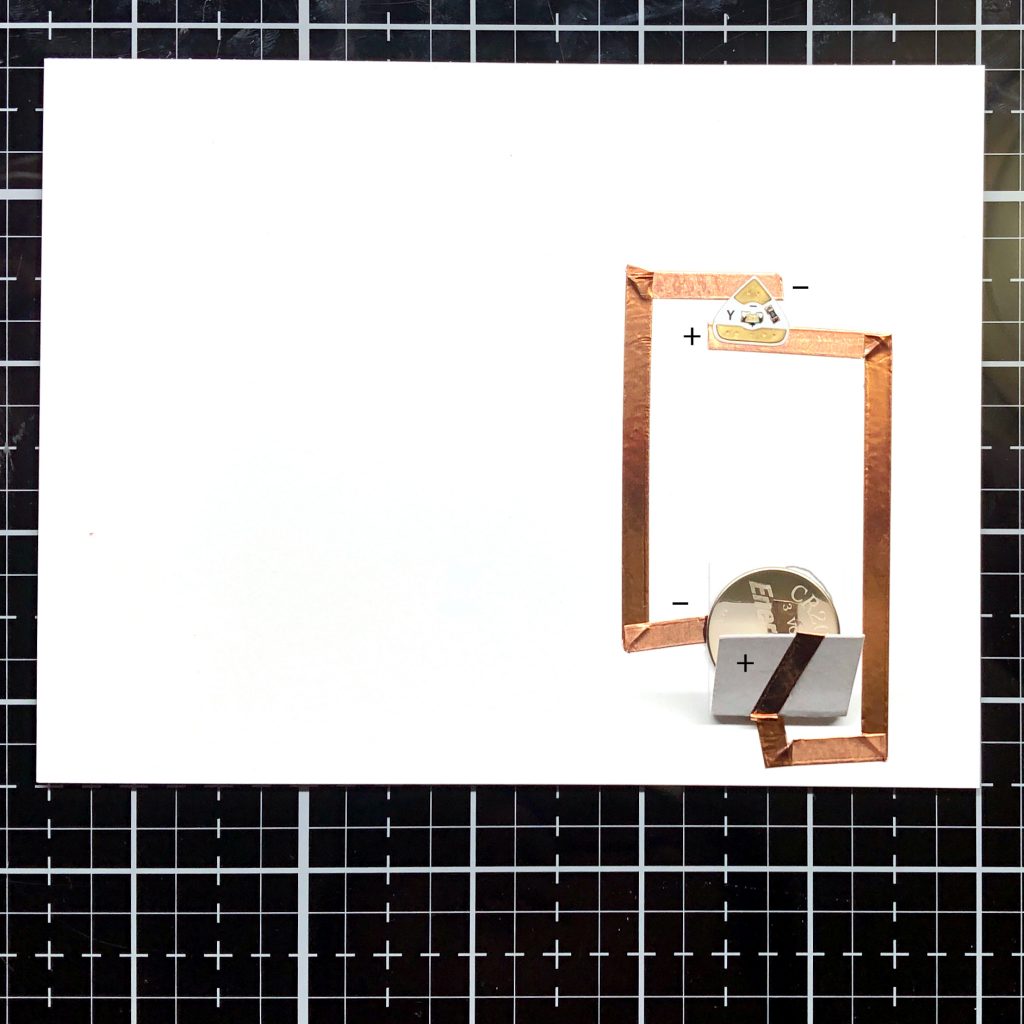
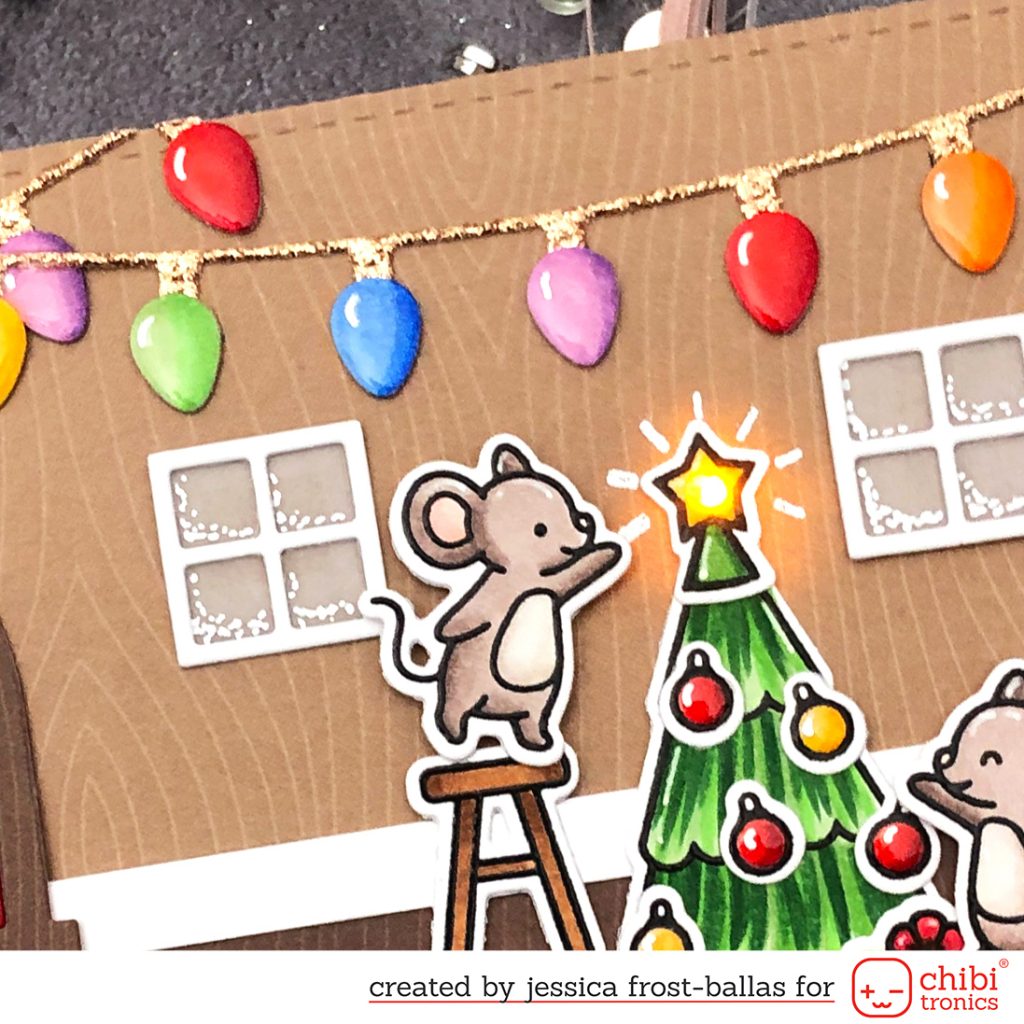
Next I die-cut a hole in the tree topper and background panel using one of the larger circular dies included in the kit. Then I traced the hole onto another panel of white cardstock to indicate where my light would be placed and built a circuit using copper tape. The negative side of the light runs under the negative side of the battery while the positive side of the light runs up and over the positive side of the battery! 🙂 Once my circuit was complete I built up a layer of foam mounting tape on the circuit panel and then placed my card panel on top!
Then it was time to create my scene! I adhered all my images with a mix of regular adhesive and foam mounting tape. Then I added a few accents with a white gel pen and a white posca paint pen. Finally I added spectrum noir clear sparkle and nuvo crystal glaze to the light bulbs and the ornaments to finish the card!
You can head to the Lawn Fawn blog or the Chibitronics blog for more inspiration using the Merry Mice kit! I also have a quick video (and a slightly slowed down video) over on my Instagram account!
 To celebrate this fun kit I’ve picked up an extra kit to send to one lucky reader! Leave me a comment and let me know if you’ve ever tried Chibitronics with your cardmaking! Leave your comments before 11:59 PM EST on November 15th, 2019 and a winner will be chosen on November 16th! Good luck! 🙂
Thanks so much for stopping by today and have a fabulous day!!
 Interested in the products I used? To make them easy for you to find, I have listed them below. (Affiliate disclosure can be found here). Your purchases through my links help keep my blog running with no additional cost to you and I thank you so much for the support!!
|



I’ve never tried them. I’ve watched a lot of tutorials showing how to, just haven’t gotten the nerve to try it myself yet😂 Thanks for a lovely card and great explanation of using Chibitronics.
Haven’t made a light up card but I would love to try it! So cute!
Was the winner announced?
Your cards are so adorable! I have never tried Chibitronics. I would love to try them. I was also told that you can change the color of your lights by coloring them with your Copic markers.
so super cute