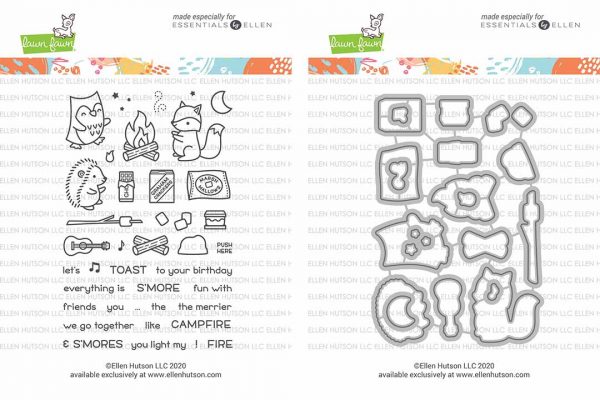
Good afternoon! I am SO SO excited to help kick off Ellen Hutson’s Summer of Stamping with the brand new collaboration release from Lawn Fawn: S’More the Merrier!! This stamp and die bundle is available exclusively at Ellen Hutson and you can find it here! Snag yours soon as this adorable set sure to sell out quickly!!
When I saw S’More the Merrier I knew it would pair perfectly with Chibitronics LED stickers to create a magical summer scene! I have a video sharing how to create a circuit with multiple lights and how to use a thin, removable battery holder so that your card doesn’t require extra postage for mailing!
I’m having a little trouble with Youtube today and the video isn’t live yet but should be up very soon! You can watch the video below or over at my YouTube channel here.
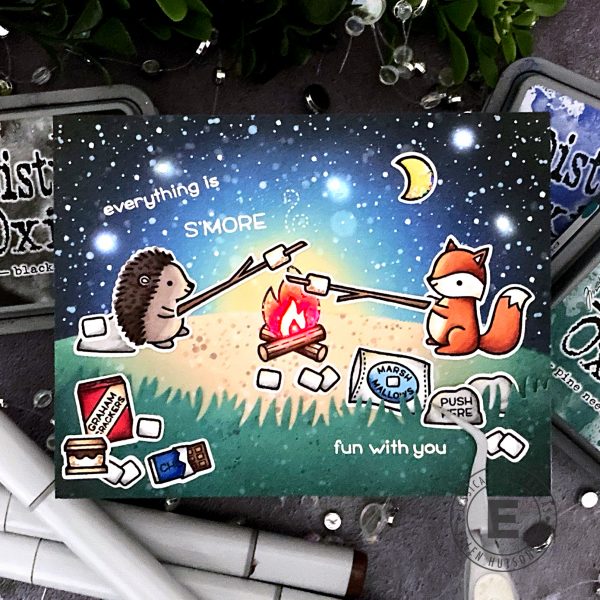
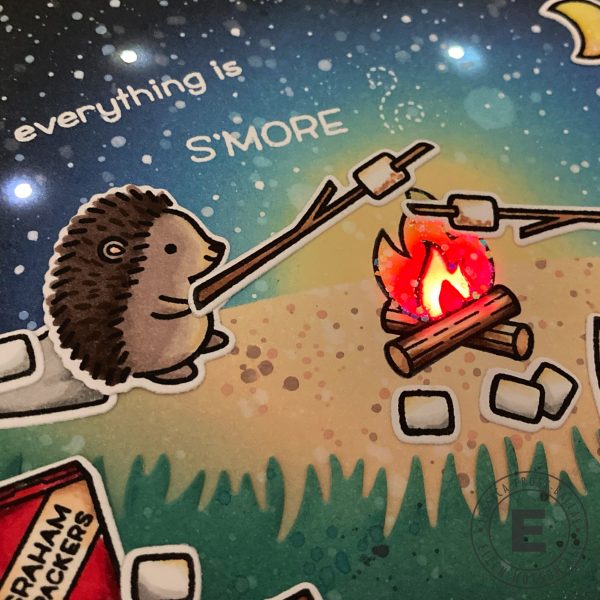
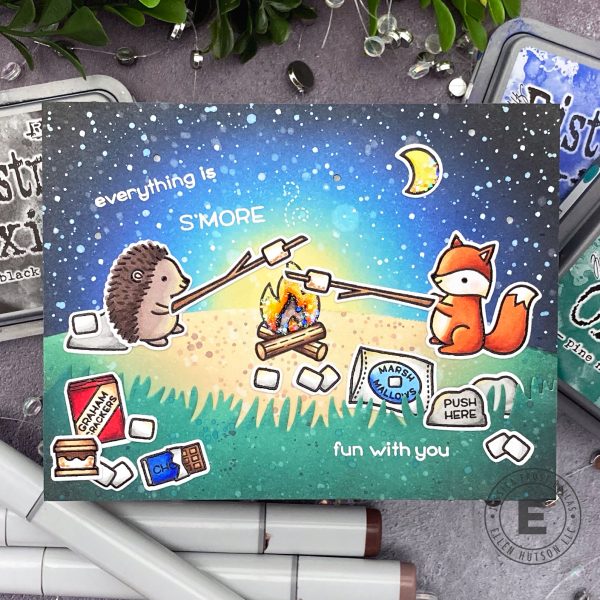
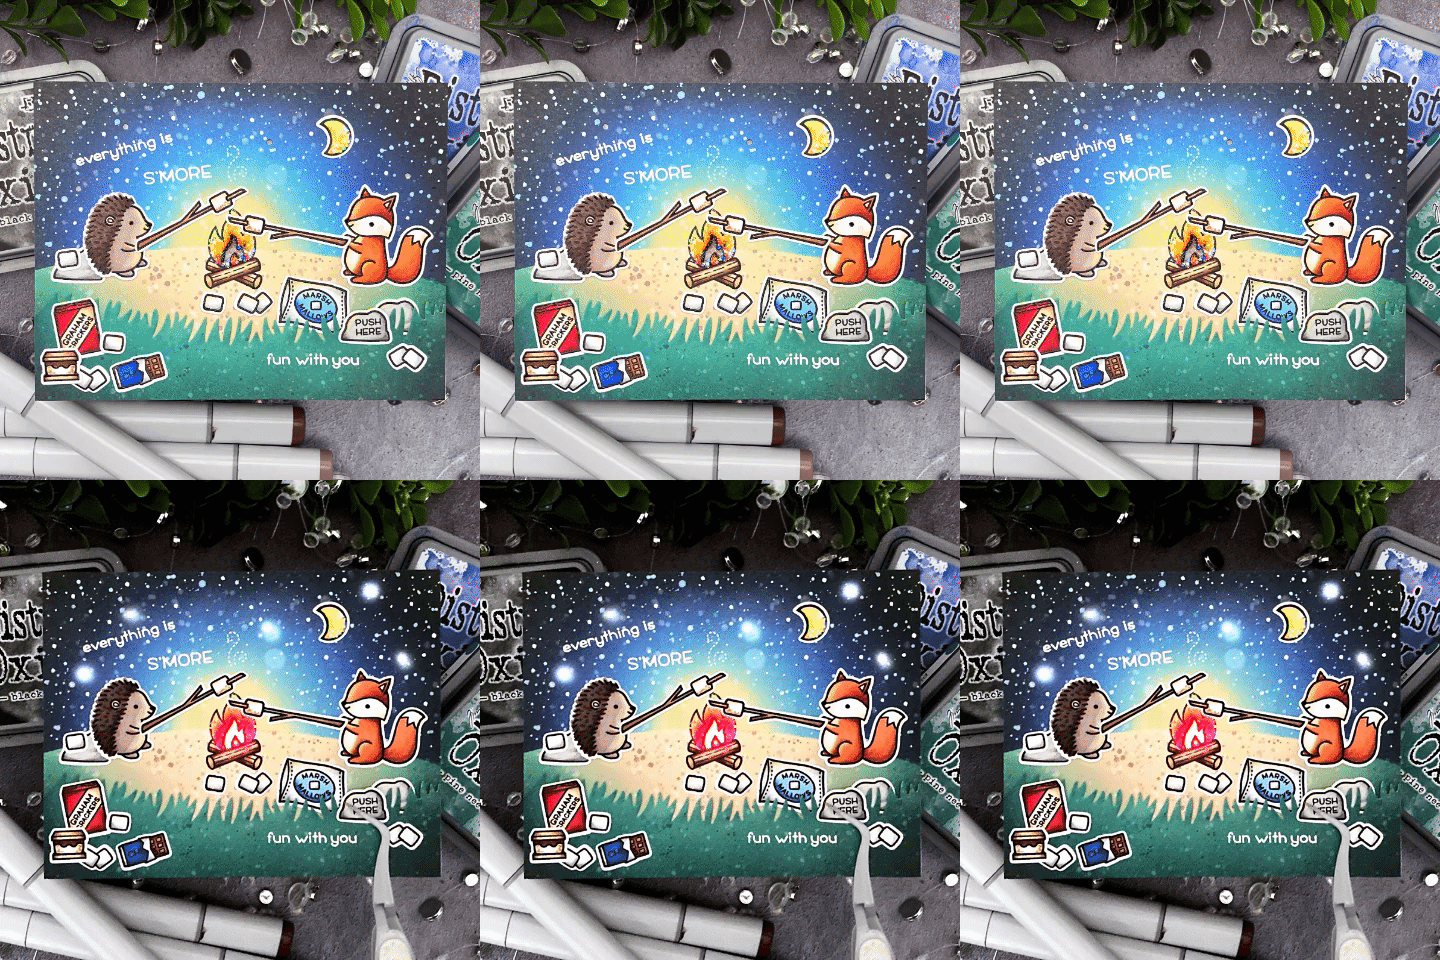
When you push the button the fire glows red and the stars shine in the summer night sky!
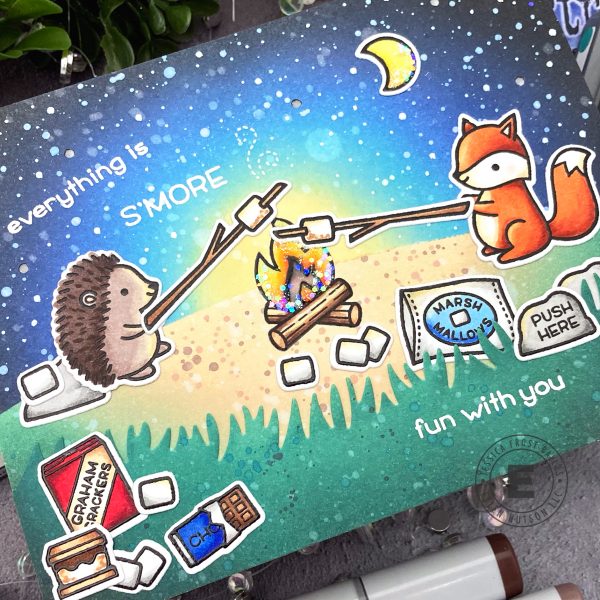
To start I stamped all the images with versafine and heat-embossed them with clear embossing powder. I colored all the images with copic markers and die-cut them with the coordinating dies. Then I stamped the campfire onto a panel of strathmore bristol cardstock and colored it with copic markers. After I finished coloring I masked the campfire and ground. Then I blended the sky with scattered straw, broken china, blueprint sketch, chipped sapphire, and black soot distress oxide ink. Next I used antique linen, tea dye, evergreen bough, pine needles, and black soot distress oxide to blend the ground and grass. I splattered the panels with water and concentrated distress oxide ink and let it dry.
I stamped the sentiment from S’More the Merrier and heat-embossed it with white embossing powder. Then I arranged the stamped images to create my scene and adhered them. At this point you could be done with the card but I decided to add a little something extra! 🙂
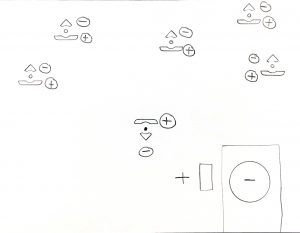
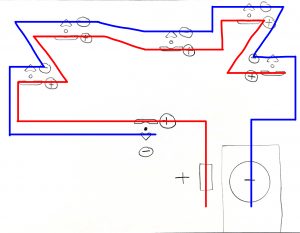
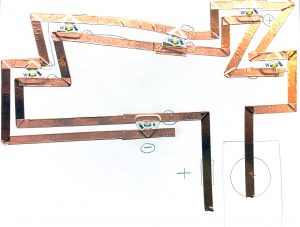
Honestly it’s easier to watch the video for all the details on creating a circuit but below I’ll include photos of my circuit for reference:
In the first photo you can see the layout of the light stickers, in the second you can see the sketch of where my copper tape will go, and in the third you can see the copper tape with the light stickers on top! I’d also recommend watching the video for more info on the battery holder that I’ve recently started using. Instead of needing to use a double or triple layer of foam mounting tape on your card you’ll only need a single A2 panel of fun foam, your card can be mailed with regular postage, AND you can remove or replace the battery easily without destroying the whole card! 🙂 It’s a total game-changer!
After I finished the circuit and adhered all the layers together I added a little crystal glaze with chunky and prisma glitter to finish the card with a little extra sparkle!!
I hope you enjoyed my video and card today! I can’t wait to see what you’re going to create with S’More the Merrier!
 To celebrate the exclusive release, Ellen Hutson is giving away a $25 gift certificates to the shop! You can leave a comment on this blog and along the hop by 11:59pm PT on July 11th, 2020 for your chance to win! The winner will be chosen at random from the comments left on any of the posts in this blog hop and will be emailed! You should have arrived from Tammy and the Lawn Fawn blog is your last stop! If you’re just getting started you can head to the Ellen Hutson blog for the complete hop list!
Thanks so much for visiting and have a fabulous day!

Interested in the products I used? To make them easy for you to find, I have listed them below. (Affiliate disclosure can be found here). Your purchases help keep my blog running and I thank you for the support!!
|







WOWZA! This is an amazing card, and I love how clean it is with the battery holder thingy.
Oh my, the lights are just the best! Way to go upping the game with this one. Sweet!!!!
Spectacular! This card is HOT!
I love the s’mores set!
Such a cute set and such a cute scene. Your fire is AMAZING!
What an adorable light-up card! I have bought some light sets but haven’t yet used them. Maybe this will give me the courage to get busy! Thanks for sharing.
Such a beautiful night scene. I love the distress ink.
I love the redesigned panel the requires regular postage. Can’t wait to try it. The vibrancy of the fire is amazing
Fantastic light up scene, love the colouring and layout. Thanks for sharing your tips and the technique video.
What an adorable card, Jess! I love seeing it light up & appreciate how well you explained the process. Totally awesome project!!
Super cute!
How creative! Such a great way to jazz up a card that is already a winner!
Wow! Great card. Off to watch the video and get so tip for making a light up card. I have only ever made one light up card. It was a lot of work and very thick.
wow!! I love how it lights up!!
Someone is going to be a very LUCKY recipient for this labor of love! Lots of work going into this, but that campfire and light up stars add the perfect touch to this camping scene!
I love your light up card and thank you for the diagram for the lights!
Great idea wonderful execution! Cute card.
Your card blew me away!
I love a Chibitronics card! Well done!
So cute!
You are absolutely amazing! Lighting up a card, wow!
WOW!
What a fantastic idea to have the card light up!
Spectacular job, thanks for sharing.
Oh my gosh! What an amazing creation! I am so intimidated by trying to create my own Chibitronics circuits, thanks you for sharing your process!!
So very sparkly
Jessica, thank you for breaking down and making the light up card so easy. The diagrams are super helpful and love the battery holder. Thank you again. I ordered this set and can’t wait to play with it.
Love your card. Thanks for sharing.