Good morning! Today’s post is a little different from my usual posts but I thought it was an interesting discovery and wanted to share it with you! Like many other papercrafters, I have recently been totally enamored by my Zig Clean Color Real Brush watercolor pens! I use them frequently and I have been relying on the color swatch cards originally released by Jennifer McGuire (as well as her tip for applying a colored dot of watercolor paper to the top of each pen cap and coverering it with glossy accents). However I’ve recently noticed that I would look at my swatch card, go looking for the coordinating pen cap, and have an awful time finding the right cap. I finally pulled out some of my pens and laid the cap top next to the swatch card…the colors weren’t even CLOSE to matching.
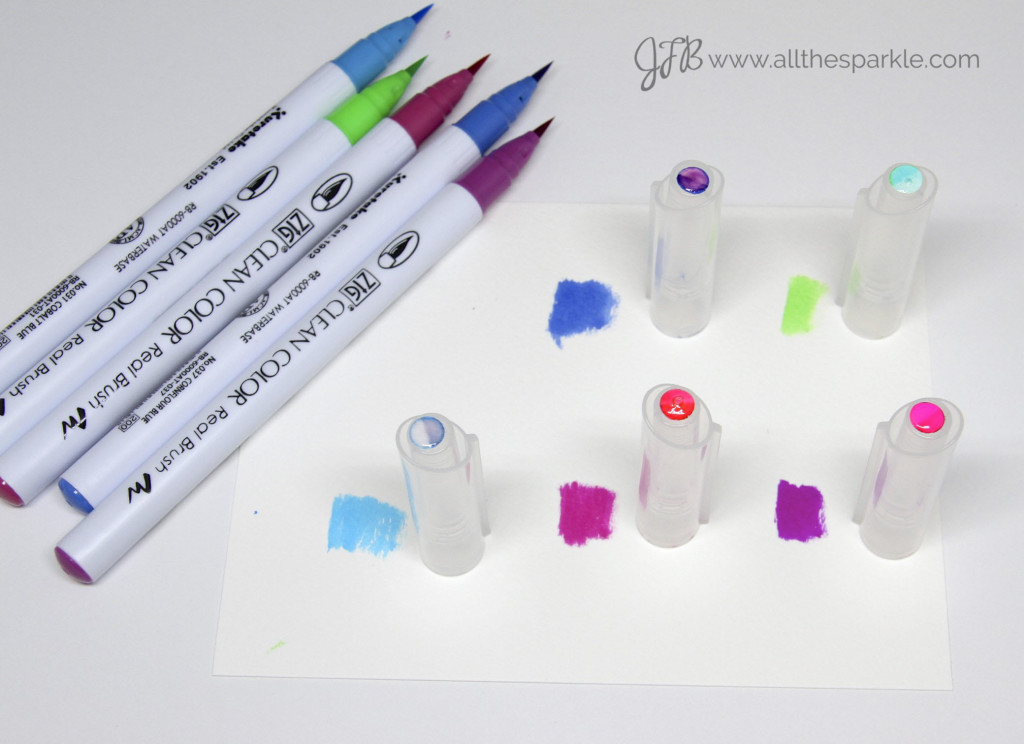
For a second I thought I had put the wrong cap on the pen until I kept looking…and realized that the majority of cap colors were nowhere close to the swatch card color. I scribbled the pens on watercolor paper and they matched the swatch card so the only possible cause for the discoloration was the glossy accents.
But just to double-check my theory, I scribbled the 082 Purple pen onto Tim Holtz watercolor paper, Canson watercolor paper, and Strathmore Bristol paper and did a little experiment. For two samples I scribbled a little of the pen on the paper and then used a water brush to blend it out a bit…for the other two I just scribbled the pen directly on the paper. On one of each sample I waited until the water was dry to the touch (about 30 minutes) and then applied a dot of glossy accents. On the other samples I waited a full 24 hours and then applied a dot of glossy accents. The bottom sample has not been altered in any way. As you can see, it didn’t matter how long I waited, the glossy accents totally discolored the sample.
On the Tim Holtz watercolor cardstock I added a dot on the control sample about 5 minutes before I took the photo…just to check and see how fast it would start to change. I also took a quick video adding a dot to another sample to show you how quickly it discolors. The purple is definitely the absolute worst with this issue but many of the markers do the same thing. I apologize for the not great quality of the video and above photos. Since I was waiting 24 hours for my experiment I was stuck taking photos and video at 1 am.
I’m sure there’s an interesting technique currently simmering away in my subconscious using glossy accents to change the colors of the pens; however, you can understand why it’s irritating to not have true colors on swatches when you go looking for a particular color.
These are my original pen cap dots…the colors are kinda dull and muddy looking and there seems to be a lot of similar shades:
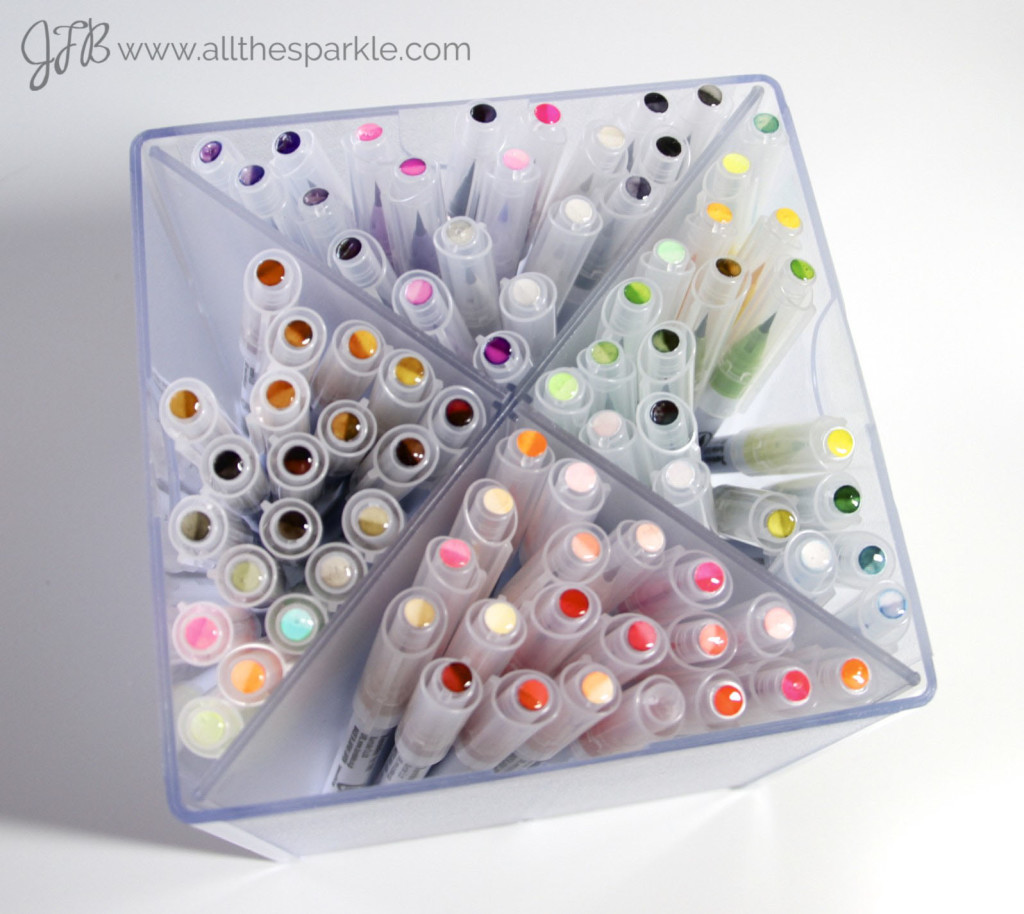
So I took off all the colored dots and re-colored fresh watercolor paper dots. I decided just to color the dots solid instead of using the waterbrush on half of the dot since the swatch cards show me exactly what the marker looks like with a waterbrush and it’s easier to see them this way. To seal them I pressed a versamark pad to the colors and heat-embossed it with clear embossing powder before hole-punching them and sticking them to the top of my pen caps with glue dots.
*If you don’t want to use embossing powder to seal the caps the fabulous Laurel Beard suggested using this fixative spray instead! I tend to get sprays all over myself (and my cat) but this would definitely be faster than embossing powder!
SO. MUCH. BETTER! Look at the vibrant (and different!) colors!
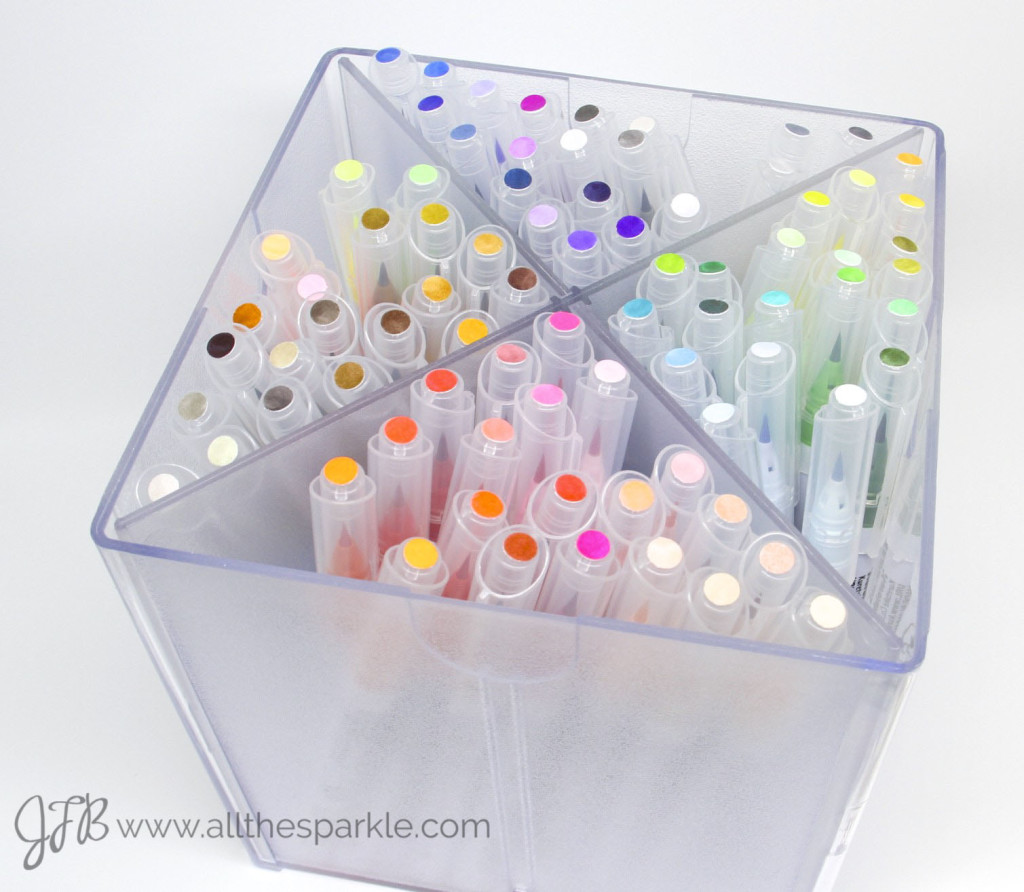
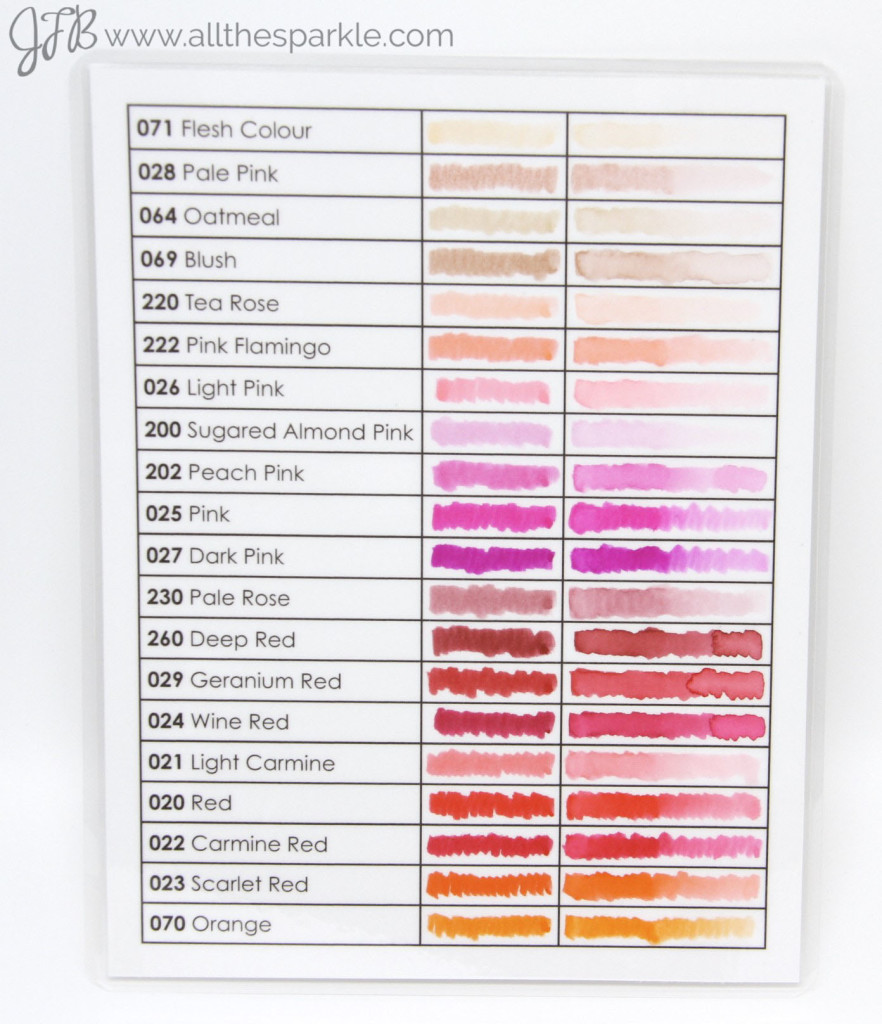
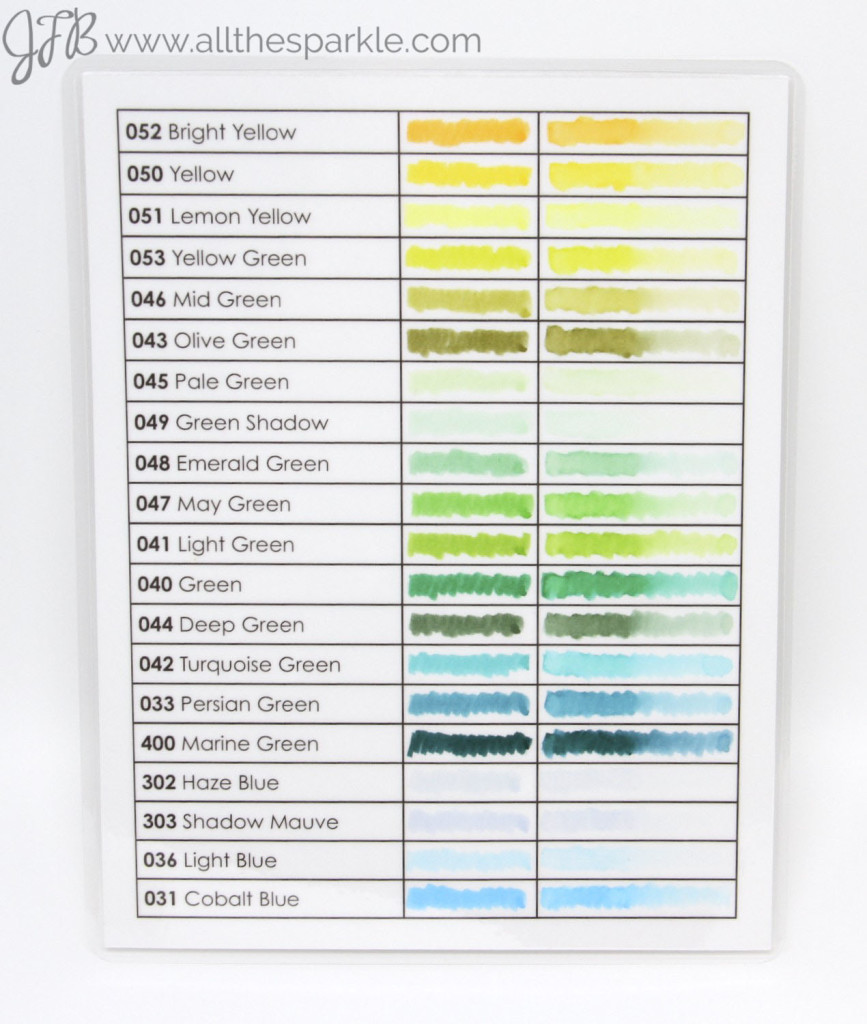
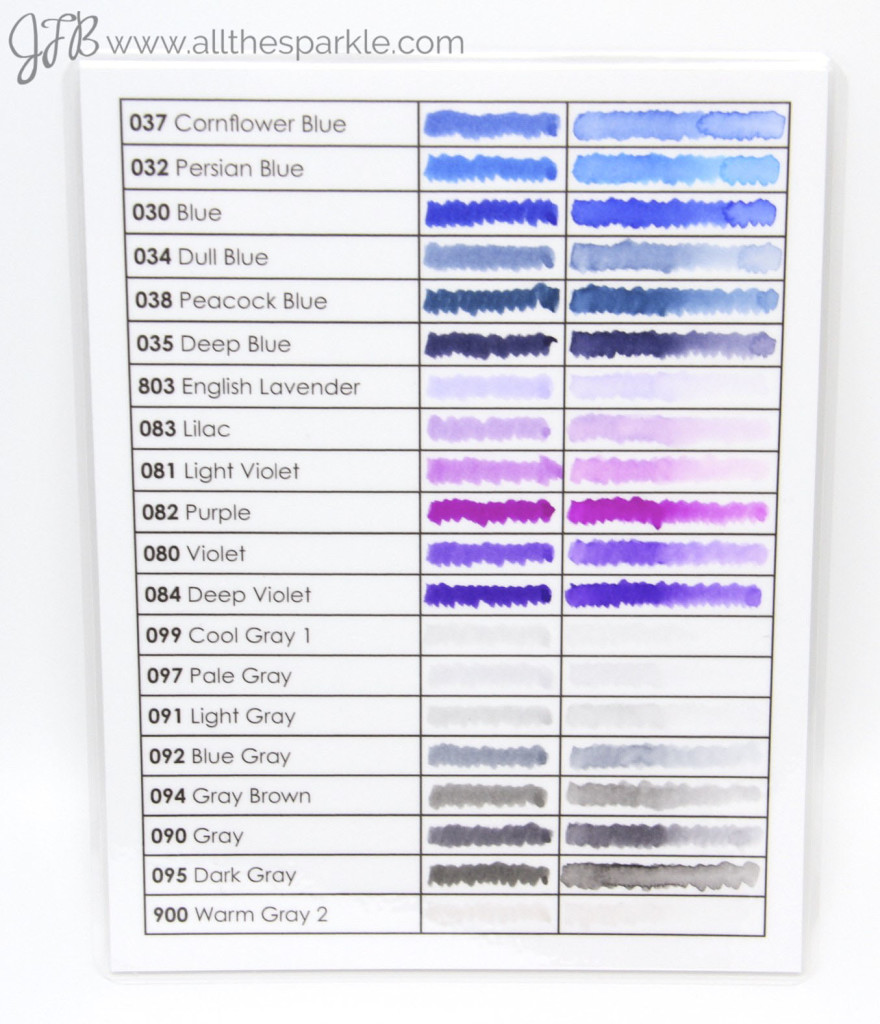
Finally, I decided to make my own Zig Clean Color Real Brush Pens Swatch Cards. I am grateful to Jennifer for the idea but they just weren’t working for me. With 80 pens I wanted to divide them equally between the 4 compartments of my storage container. Using her swatch cards meant that I couldn’t tell which markers were in which compartment and it became quite frustrating looking for the pen I wanted (of course, the discolored caps didn’t help much). I also changed around the order of the colors to better fit the way I see the colors. I printed the cards on watercolor paper, colored them, and then laminated them for greater durability. With lamination, I like that I can use the back of a swatch card as a palette while I’m working. I intentionally left a larger margin around the card so it would stand higher than the lip of the box (making it easier to pull out) but if you trimmed the margin closer it would fit inside the box without peeking over the top!
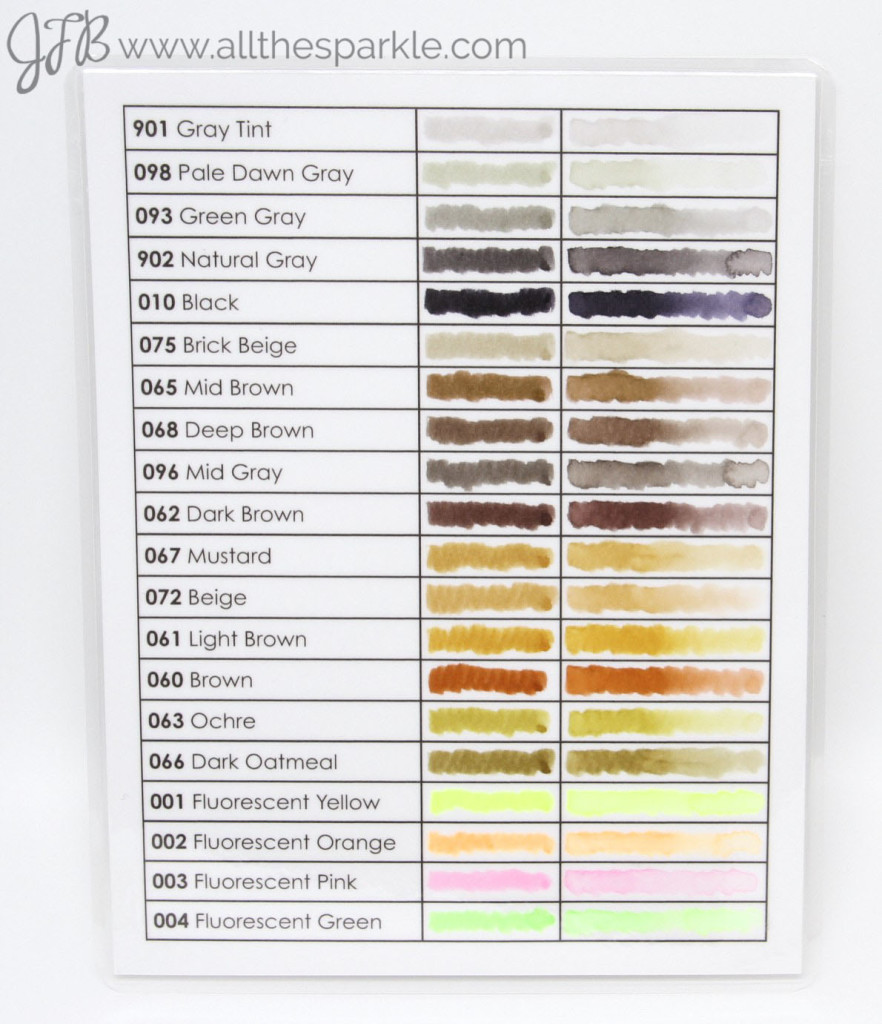 If you’re interested in using my swatch cards you can download them here: Zig Clean Color Real Brush Pens Swatch Cards! This swatch chart was created by me so please do not reproduce, sell, or distribute it without permission. It is intended for personal use only!
Anyway, I hope this post was helpful and thanks so much for visiting!




Great idea with the Zigs. Thanks for the download.
Terrific post Jess … thanks for sharing
Can you tel me if there are any new colors? I have the original 180 bought a couple of years ago.
Sadly no new colors! Just the original 80!
Curious what the best papers for practicing with these real brush markers are. I’m new to brush lettering and I see lots of lists out there for use with Tombow Dual Brush markers but with the felt tip the markers seem pretty different to me. I own and use both. Not sure if the same paper is good for both. Thanks! SIAP.
Thanks so much for sharing your experiments and ways that you organize! Thanks so much too for the swatch charts. I managed to get them printed on watercolor paper and colored in the boxes for the pens I have.
Thank you for the organizing tips for Zigs. I love your swatch sheets, TFS! They helped me figure out where the “holes”were in my current collection of Zig markers.
Thank you so much for your help with the zigs. After spending so much on them, it’s nice to be able to get as much out of them as possible!
Thank you for sharing your swatch cards and experience with identifying the markers. The way in which you organized the colors is great. I struggle with fitting some colors into groups and this is really helpful.
Just came across this post. I will definitely be downloading your chart and getting my zigs organized. I love them but having to store them cap up makes it hard to pick what colors I need without dumping them all out. Looks like this would take a little bit of time, but it would be worth it in the end. I actually have that cube, just have to find it. Thanks for sharing.
Hi Jessica,
I appreciate so much that you included a download for the ZIG Clean Color Real Brush Marker chart you created. I was so excited to see my chart filling up as I added new colors to my collection. But then I learned that there are quite a few other colors not included in your chart. Next time you update your chart, you may want to add those colors. Thanks again for such a helpful tool!
Thank you for providing the swatch chart and for explaining how you handle and store your pens.